
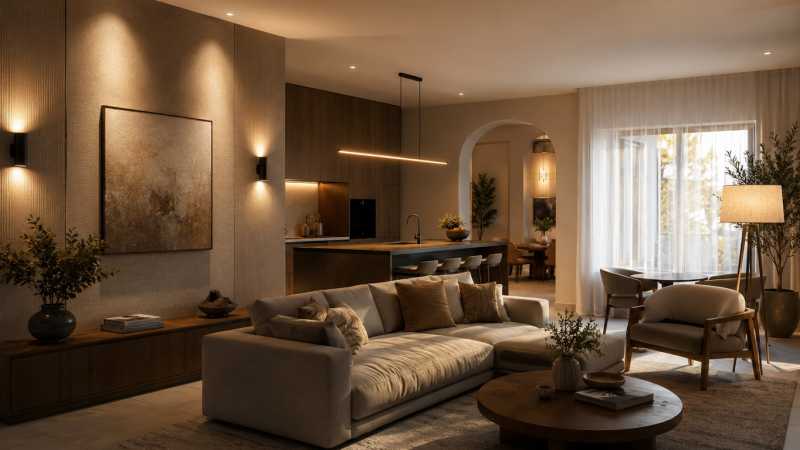
You walk into a room you just finished decorating. The furniture is right. The colors work. But something still feels wrong, and you can’t figure out what it is. Nine times out of ten, it’s the lighting that’s throwing everything off.
Most people treat lighting as an afterthought, picking fixtures based on looks alone and hoping they’ll work. That approach leaves rooms feeling flat, uninviting, or just plain awkward. The good news is that fixing bad lighting doesn’t require a full redesign. Small, deliberate adjustments to how you use a wall light in different zones can shift the entire mood of a space. You just need to know where the common mistakes happen and how to correct them before they become permanent. This guide walks through the lighting errors that sabotage otherwise well-designed rooms, plus the quick fixes that actually work.
Relying on One Central Fixture for the Whole Room
Overhead lighting by itself creates harsh shadows and uneven coverage. A single ceiling fixture might illuminate the center of a room, but it leaves corners dim and faces unflattering. According to the Illuminating Engineering Society, layered lighting that combines ambient, task, and accent sources improves both functionality and visual comfort.
When you depend on one light source, you lose depth. Rooms feel flat because there’s no variation in brightness or warmth. Adding sconces or directional lights near seating areas or artwork immediately creates dimension. The goal is to have multiple light sources at different heights so the space feels balanced from every angle.
A 2025 study from the American Lighting Association found that homes with three or more light sources per room scored 34% higher in occupant satisfaction surveys compared to single-fixture setups. That’s a measurable difference in how people experience a space daily.
Ignoring the Color Temperature Mix in One Space
Not all bulbs produce the same kind of light, and mixing warm and cool tones randomly makes a room feel chaotic. Warm light (2700K to 3000K) works well in living rooms and bedrooms because it’s inviting. Cool light (4000K and above) suits kitchens and bathrooms where you need clarity and focus.
The mistake happens when someone installs warm bulbs in table lamps and cool bulbs in ceiling fixtures within the same room. Your eye picks up the inconsistency, even if you don’t consciously register it. The space feels disjointed.
Stick to one color temperature per room unless you’re deliberately zoning areas with different functions. If you’re lighting a kitchen island separately from the dining area, that’s a case where a slight shift works. Otherwise, keep it uniform.
Placing Fixtures at the Wrong Height
Height matters more than most people think. Sconces installed too high blast light at the ceiling instead of illuminating the room. Pendant lights hung too low block sightlines and create glare. There’s a functional range for each fixture type, and ignoring it kills both the look and the usability.
For sconces, the center of the fixture should sit between 60 and 66 inches from the floor. That range puts the light at eye level without shining directly into your face. Pendant lights over dining tables should hang 30 to 36 inches above the surface. Over kitchen islands, you can go slightly higher, around 36 to 40 inches, depending on ceiling height.
When fixtures sit outside these ranges, the light either misses its target or creates uncomfortable glare. It’s one of those details that seems minor until you adjust it and realize how much better the room feels.
Skipping Dimmers and Limiting Control Options
Fixed brightness locks you into one mood. Dimmers let you adjust light levels based on time of day, activity, and personal preference. A room that needs bright task lighting in the morning can benefit from softer, ambient light in the evening.
Installing dimmers on all your main light sources gives you flexibility without adding more fixtures. You can dial down overhead lights during movie nights or bring them up when you’re working. It’s a simple upgrade that makes every lighting layout more versatile.
Modern LED-compatible dimmers are affordable and easy to install. According to data from Energy Star, dimmable LED bulbs can also extend bulb life by up to 25% when operated at reduced output, which saves money over time.
Overlooking the Power of Linear Fixtures in Open Layouts
Open-concept spaces need lighting solutions that define zones without adding physical barriers. That’s where thoughtfully installed linear light fixtures become invaluable, especially over kitchen islands, dining tables, or workspace areas that flow into living rooms. These fixtures provide focused illumination that signals where one area ends and another begins, all while maintaining visual continuity across the space.
Linear fixtures work because they distribute light evenly along a defined path. Unlike single pendants that create pools of light with gaps in between, a linear setup covers the entire surface. That consistency is critical in kitchens where you’re prepping food or in home offices where task lighting needs to be reliable.
Many homeowners default to multiple pendant lights in a row, which can feel cluttered or mismatched. A single linear fixture achieves the same coverage with a cleaner profile. It’s a design choice that simplifies installation, reduces visual noise, and delivers better functional lighting.
Using the Wrong Shade or Bulb Direction
The shade on a fixture controls where light goes. An opaque shade directs light up or down. A translucent shade diffuses it in all directions. Choosing the wrong one for your needs means you’re either wasting light or getting too much glare.
If you want to highlight a wall texture or create ambient uplighting, you need a shade that directs light toward the ceiling. If you need task lighting for reading or cooking, you want a shade that focuses light downward. Mixing these up is a common mistake that makes lighting feel inefficient.
Bulb direction works the same way. If your fixture allows you to angle the bulb, point it where you actually need the light. It sounds obvious, but a lot of people install adjustable fixtures and never adjust them. That leaves entire areas under-lit while other spots get too much brightness.
Forgetting About Natural Light When Planning Artificial Sources
Natural light changes throughout the day, and your artificial lighting should account for that. A room flooded with sunlight in the morning might need minimal artificial light, but that same room will feel cave-like by evening if you don’t have enough supplemental sources.
The mistake is designing a lighting layout based on one time of day. People pick fixtures that look good at noon and then wonder why the room feels dark and uninviting after sunset. You need to plan for the worst-case scenario, which is usually evening or overcast days when natural light is minimal.
Layering your lighting setup so you can turn on only what you need at any given time solves this issue. You’re not stuck with all lights on or all lights off. You can adjust based on how much natural light is available and what you’re doing in the space.
Real-World Lighting Fixes That Work Immediately
Here are three adjustments you can make today without hiring an electrician or buying new fixtures.
- Swap your bulbs for the right color temperature. If your space feels cold and clinical, replace cool bulbs with warm ones. If it feels muddy and dim, try a neutral white around 3500K.
- Add a floor lamp or table lamp to a dark corner. This instantly creates balance and gives you another light source to layer with overhead fixtures. You don’t need to hardwire anything.
- Install dimmer switches on your most-used lights. This gives you control and makes every room more adaptable. You can do this yourself with basic tools in under an hour per switch.
FAQ
What’s the best way to light a room with low ceilings?
Use flush-mount or semi-flush fixtures instead of hanging pendants. Add wall sconces to bring light sources down to a comfortable level. This keeps the ceiling clear while still providing enough illumination.
How many light sources should a living room have?
Most living rooms benefit from at least four sources: overhead ambient light, two task lights like table or floor lamps, and one accent light for artwork or architectural features. This creates enough flexibility to adjust the mood without leaving any area too dim. You can add more if the room is large or if you have distinct zones like a reading nook or media area. The key is making sure no single fixture has to do all the work.
Can you mix different fixture styles in one room?
Yes, but keep a unifying element like finish or bulb type. Mixing metals is fine as long as they’re intentional choices, not random leftovers. The overall look should feel cohesive even if the styles vary.
Do LED bulbs work with all dimmer switches?
Not all of them. Older dimmer switches designed for incandescent bulbs can cause LEDs to flicker or hum. Look for LED-compatible dimmers, which are specifically designed to handle the lower wattage and electronic drivers that LEDs use. Most newer dimmer models are compatible, but it’s worth checking the packaging before you buy. If you’re experiencing issues, swapping the dimmer is usually the fix, not the bulb.
Where Lighting Decisions Matter Most
Lighting isn’t just about seeing clearly. It shapes how a room feels, how people interact in it, and whether they want to stay or leave. The mistakes that kill a lighting layout are usually fixable without major renovations. You don’t need to start over. You just need to know where the problems are and make targeted changes that address them.
As design moves toward more flexible, multi-functional spaces, lighting becomes even more important. The ability to adjust brightness, change focus, and layer light sources gives you control over your environment in ways that static furniture and paint colors can’t. Getting the lighting right means your space works for you, not against you, every time you walk through the door.